# How to integrate Keycloak with Chainguard
URL: https://chainguard-docs-preview-git-1016-404s.chainguard.app/platform/administration/custom-idps/idp-providers/keycloak.md
Last Modified: September 28, 2026
Tags: Chainguard Containers, Procedural
Procedural tutorial on how to register a Keycloak client and integrate it with the Chainguard platform.
By default, the Chainguard platform supports Single sign-on (SSO) authentication for users with GitHub, GitLab, and Google.
This guide outlines how to create a [Keycloak](https://www.keycloak.org/) Client on your existing Keycloak instance and integrate it with Chainguard. After completing this guide, you'll be able to log in to Chainguard using Keycloak and will no longer be limited to the default SSO options.
## Prerequisites
To complete this guide, you will need the following:
* `chainctl` installed on your system. Follow our guide on [How to install `chainctl`](/platform/chainctl-usage/how-to-install-chainctl/) if you don't already have this installed.
* An existing Keycloak instance with admin access to the realm you will be using to authenticate.
## Create a Keycloak client
To integrate Keycloak with the Chainguard platform, log in to your Keycloak admin interface. In the left-hand navigation menu, select **Create client**.
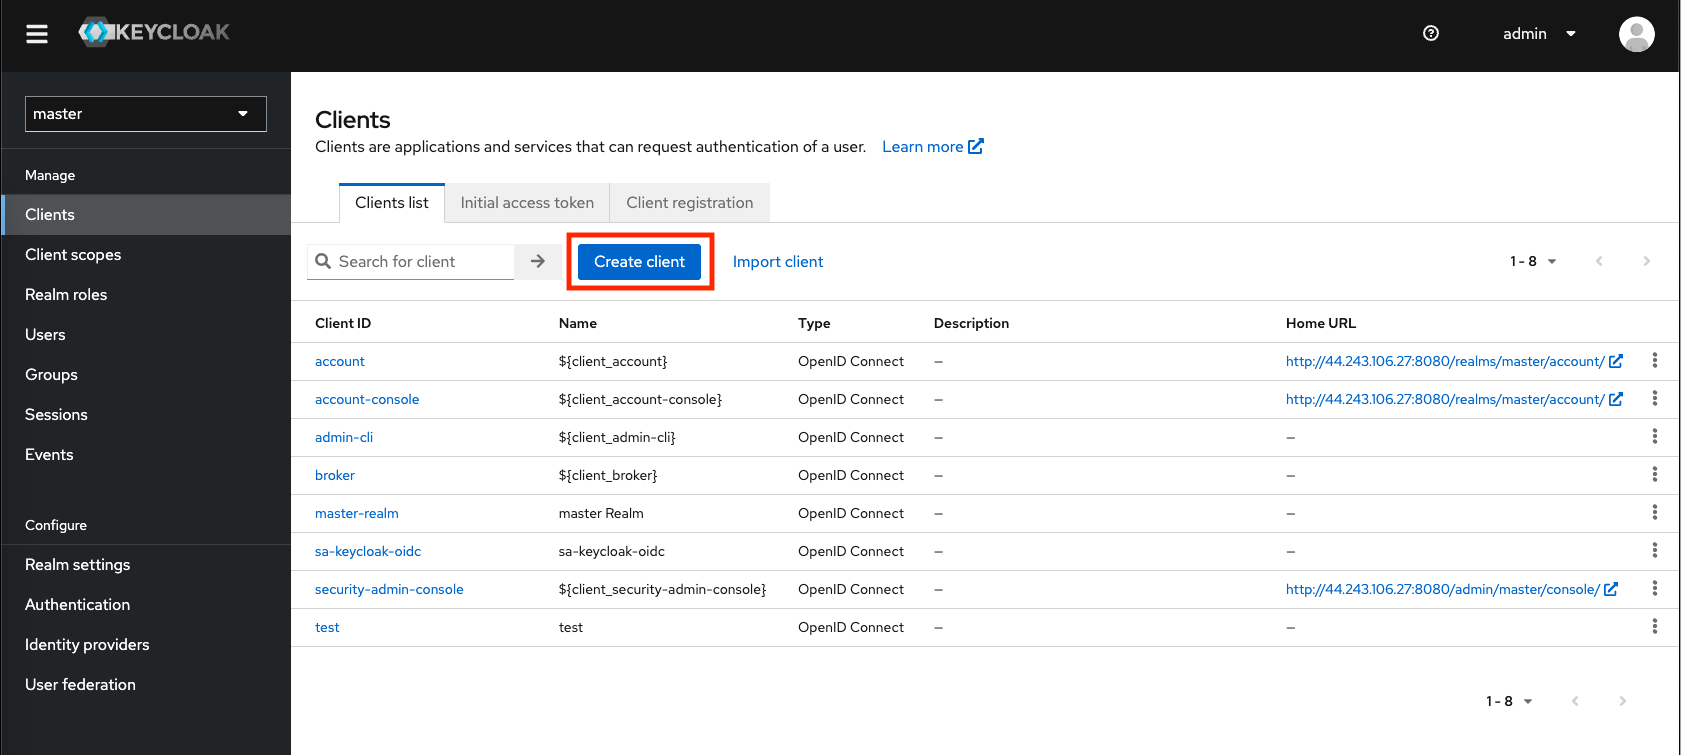
Configure the new client through the wizard:
1. Set the **Client Type** to OIDC Connect and set your **Client ID**. Add a friendly **Name** and **Description** if desired. Note your **Client ID** value — you'll need it to configure the Chainguard platform to use this Keycloak Client. Click **Next**.
2. Toggle **Client Authentication** on and click **Next**.
3. Set the Chainguard platform redirect URI in the **Valid redirect URIs** field, then click **Save** to finalize the client.
Navigate to the **Credentials** tab of your newly created client.
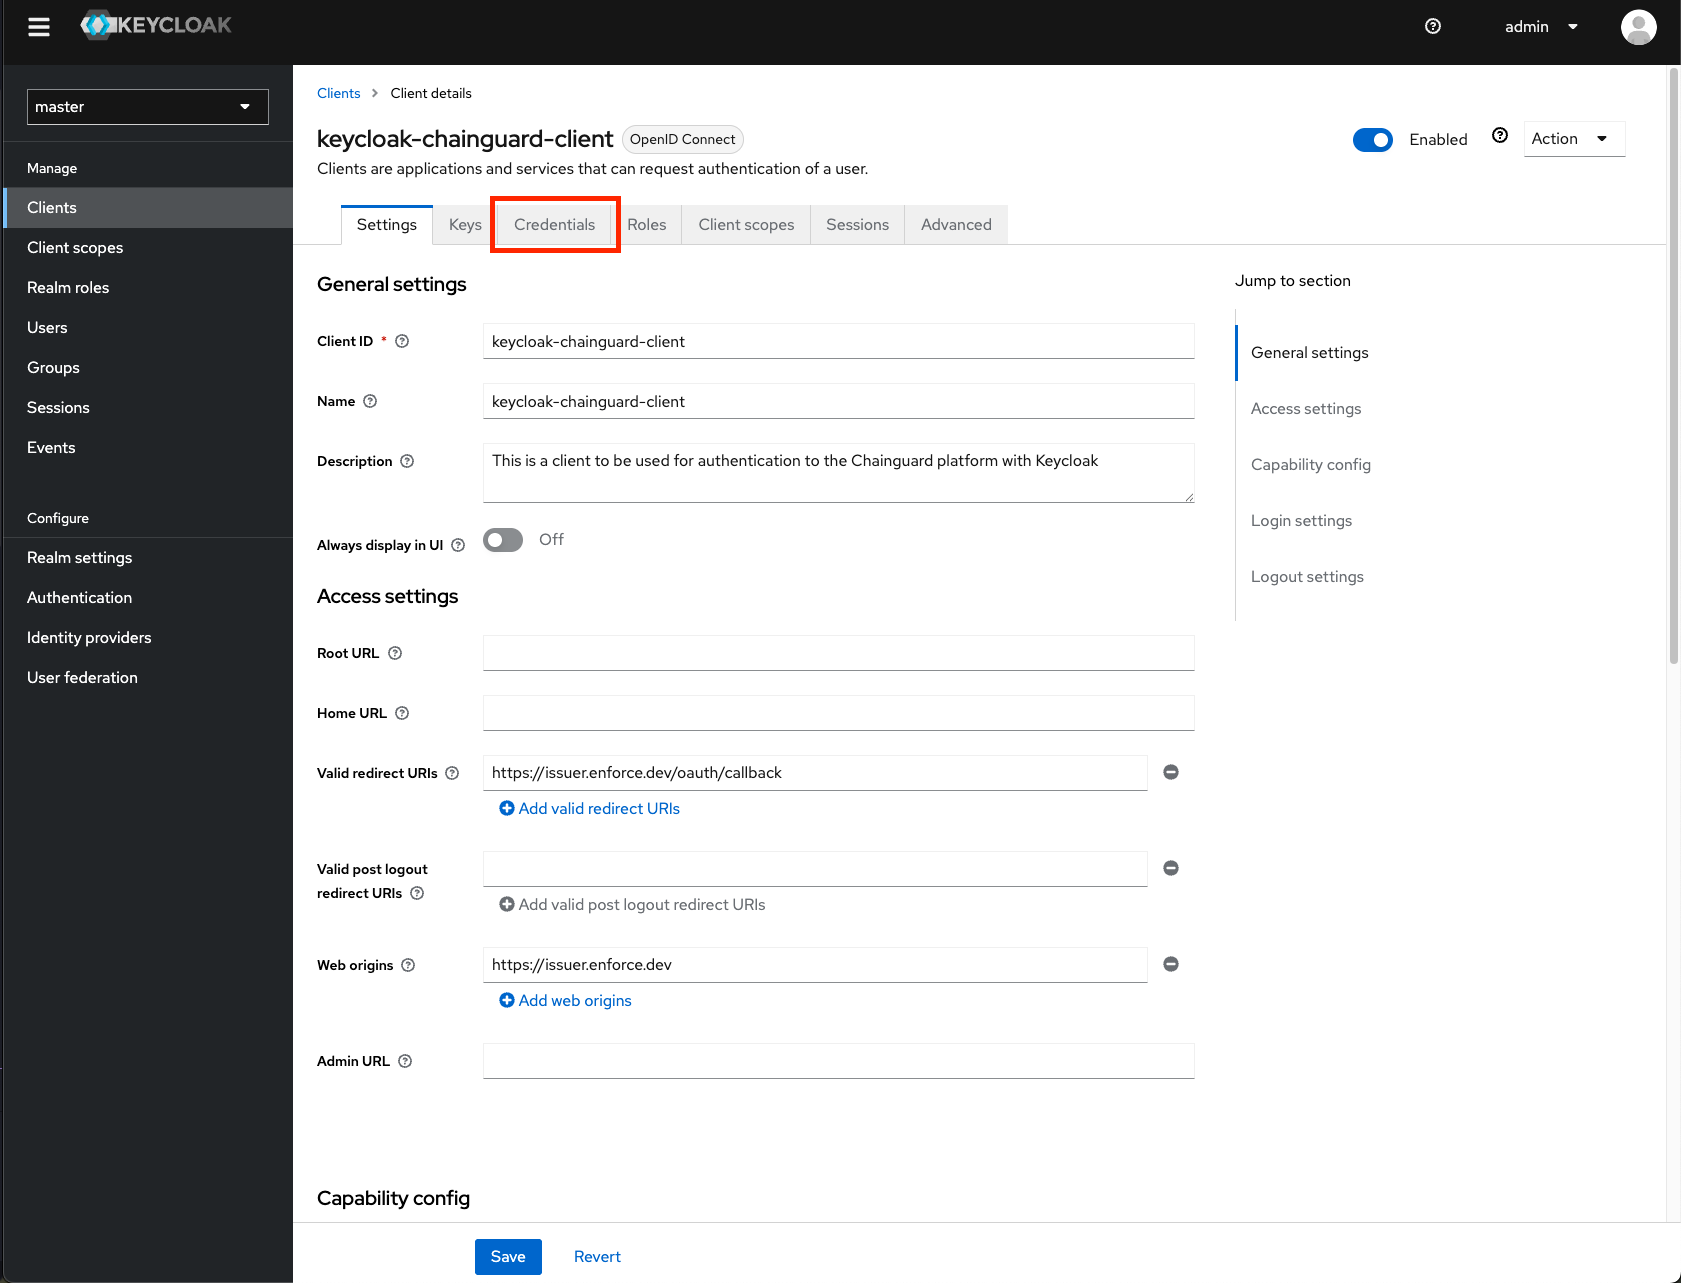
Copy the **Client Secret** value. You'll need this to configure the Chainguard platform to use this Keycloak Client.
## Configure Chainguard to use your Keycloak client
Now that your Keycloak Client is ready, you can create the custom identity provider.
First, log in to Chainguard with `chainctl`, using an OIDC provider like Google, GitHub, or GitLab to bootstrap your account.
```sh
chainctl auth login
```
Note that this bootstrap account can be used as a [backup account](/platform/administration/custom-idps/custom-idps/#backup-accounts) (that is, a backup account you can use to log in if you ever lose access to your primary account). However, if you prefer to remove this role-binding after configuring the custom IdP, you may also do so.
To configure Chainguard, make a note of the following details from your Keycloak Client:
* **Client ID**: This can be found on the **Settings** tab of the Keycloak Client.
* **Client Secret**: This can be found on the **Credentials** tab of the Keycloak Client.
* **Issuer**: Your **Issuer** URL is defined by the following pattern `https:///realms/`
If you belong to more than one Chainguard organization, you will also need the UIDP of the one under which you want to install the identity provider. Your selection won’t affect how your users authenticate but will have implications on who has permission to modify the SSO configuration.
You can retrieve a list of all the Chainguard organizations you belong to — along with their UIDPs — with the following command.
```shell
chainctl iam organizations ls -o table
```
```output
ID | NAME | STATUS | DESCRIPTION
------------------------------------------|------------|--------|----------------------------------
591**********************************c43 | sample_org | ready | A sample Chainguard organization
. . . | . . . | . . . | . . .
```
Note down the `ID` value for your chosen organization.
With this information in hand, create a new identity provider with the following commands. Replace `` and `` with the values from your Keycloak client, and `` and `` with your Keycloak server address and realm.
```sh
export NAME=keycloak-idp
export CLIENT_ID=
export CLIENT_SECRET=
export ISSUER="https:///realms/"
chainctl iam identity-provider create \
--configuration-type=OIDC \
--oidc-client-id=${CLIENT_ID} \
--oidc-client-secret=${CLIENT_SECRET} \
--oidc-issuer=${ISSUER} \
--oidc-additional-scopes=email \
--oidc-additional-scopes=profile \
--default-role=viewer \
--name=${NAME}
```
`chainctl` installs the provider in your organization automatically when you belong to only one. If you have access to more than one, add `--parent=` to choose where it is installed.
Note the `--default-role` option. This defines the default role granted to users registering with this identity provider. This example specifies the `viewer` role, but depending on your needs you might choose `editor` or `owner`. If you don't include this option, you'll be prompted to specify the role interactively. For more information, refer to the [IAM and security section](/platform/administration/custom-idps/custom-idps/#iam-and-security) of our Introduction to Custom Identity Providers in Chainguard tutorial.
You can refer to our [Generic integration guide](/platform/administration/custom-idps/custom-idps/#generic-integration-guide) in our Introduction to Custom Identity Providers article for more information about the `chainctl iam identity-provider create` command and its required options.
To log in to the Chainguard Console with the new identity provider you just created, navigate to [console.chainguard.dev](https://console.chainguard.dev) and click **Use Your Identity Provider**. Next, click **Use Your Organization Name** and enter the name of the organization associated with the new identity provider. Finally, click the **Login with Provider** button. This will open up a new window with the Keycloak login flow, allowing you to complete the login process through there.
You can also use the custom identity provider to log in through `chainctl`. To do this, run the `chainctl auth login` command and add the `--identity-provider` option followed by the identity provider's ID value:
```sh
chainctl auth login --identity-provider
```
The ID value appears in the `ID` column of the table returned by the `chainctl iam identity-provider create` command you ran previously. You can also retrieve this table at any time by running `chainctl iam identity-provider ls -o table` when logged in.